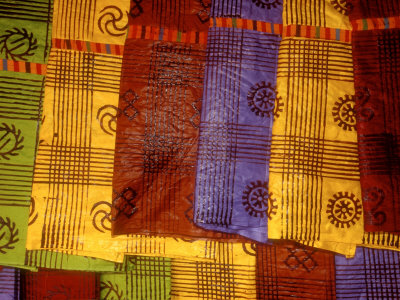
In honor of Black History Month, my second graders are going to be learning about Adinkra Cloths. I show the students a PowerPoint about the Adinkra Cloths and how they are made. We learn that Adinkra clothes are hand printed fabrics that the Ashanti people of Ghana made.
I ask the students what is a symbol? We talk about symbols that we see in our everyday life such as the apple for mac computers, A peace Sign, the American Flag etc. I explain to them that the Ainkra clothes are made up of symbols. I give them a handout of some of the most commonly used symbols.

This project involves many concepts and skills such as drawing, Printmaking, Self Portraits, and working with Mixed. Media.


Our printmaking papers get put to the side. I ask the students what is a symbol? We talk about symbols that we see in our everyday life such as the apple for mac computers, A peace Sign, the American Flag etc. I explain to them that the Ainkra clothes are made up of symbols. I give them a handout of some of the most commonly used symbols.

This project involves many concepts and skills such as drawing, Printmaking, Self Portraits, and working with Mixed. Media.

- The first step is Printmaking.
- Students get sketch paper and must make 4 sketches of different symbols.
- Students then get three 2in x 2in square of styrofoam to make their best three symbols into stamps. I demonstrate to the students how they are to use their pencil to make indents into the styrofoam. They need to make it deep enough without going through the styrofoam and making a hole.
- The students get a 12inx12in piece of tan paper. They fold it in half to make 16 squares total.
- I put out printmaking trays (they are slanted with a pit at the bottom for the paint.. this way the rollers can get dipped in the paint and then roll up the ramp to fully cover the roller & get rid of excess paint) They are given red, blue, green, and yellow.
- Students roll the paint onto their symbols and stamp them into the boxes pressing hard. I point out to them that each symbol needs to stay one color OR they need to watch their symbol before switching colors.
- THe students get black paint and different rollers and plastic forks to add borders around their symbols.


2. Self Portaits
- I give students a portrait worksheet. We go over the basics. We draw the shape of our faces starting with a rainbow line for the top of the head I encourage them to fill their pages. They must add a neck!
- We look at the worksheet and notice that the eyes are located halfway down the face. This is really important because if this is not reviewed you will have all the eyes up on the forehead. The bottom of the nose is halfway from the eyes to the chin, and the lips are halfway between the nose and the chin. This helps students with the basic set up.
- Students each get a portrait mirror, Skin Colored Construction paper, skin colored crayons and begin
- Students cut out their head and neck
- Students pick the materials that most resemble their hair and add that on!


3. Combing The Two Projects
- Students get a T-shirt shaped Tracer. They trace this onto their printed paper
- The shirt is cut out.
- They choose their color of 11"x14" background paper
- Their head is glued on first and the shirt is glued on top, covering the bottom of their neck.


No comments:
Post a Comment