Pages

Showing posts with label 2nd Grade. Show all posts

Sunday, April 3, 2016

Mine craft

A 2nd Grade class earned their 10 clips up and voted on Mine Craft!  They used colored squares (this art teacher did a lot of cutting that week!) to create a Mine Craft picture.  Some even created a Mine Craft Self Portrait!

Paul cezanne still lifes

Second Graders are studying Still Lifes.  We looked at the work of Henri Matisse and Paul Cezanne.
Two very different styles of still lifes.

                             Image result for The Basket of Apples   Image result for henri matisse goldfish
We talked about drawing from observation.  This is a great way to become a better artist!  The students were given apples bananas and oranges to study.  I encouraged them to draw what they saw not just a perfect circle or apple shape.  The oil pastels were then used to blend the colors.  


Friday, January 15, 2016

Winter penguins


2nd Graders painted penguins and then used collage techniques to make their winter gear!  This was a really fun drawing project that led us to learn more about penguins!  


Winter carolers


Second Graders made multi media 3-D Carolers to help decorate for the Winter Concert.  These students used collage techniques to build their Carolers using paper, yarn, pom poms & oil pastels.  

Sunday, December 13, 2015

Color Wheel


Students work together to mix the primary colors and make the secondary colors!  We read the book, "Mouse Paint" and mixed the colors together as the mice in the story did.  These second graders did such a great job and loved the discovery!
Once students have their colors wheels done, they glued them onto a paper and turned them into something new!   

Sunday, November 15, 2015

Picasso Monsters

Some Second Grade classes have been working on Picasso Monster Collages.  Students learned about Pablo Picasso and Cubism and then created their own Monsters inspired by Pablo Picasso.  


Sunday, October 18, 2015

Ah! Monsters!


Some Second Grade Classes are making Monsters with Pop Out Mouths.  So after reading When a Monster was born the class drew their monster mouth, teeth, and then painted the inside,  


The mouths were then cut out and glued onto white paper.  I made my first Teachers Pay Teachers purchase and it has been a huge hit! Check it out here:  Monster Game! It is a monster making game- How Appropriate since monsters have taken over the art room!  Students get a monster sheet and a die, each time they roll it correlates to a monster body part.  This really helped get their imaginations going as students created a monster body around their mouth!  


Look how cute these monsters came out!!! 

Thursday, December 20, 2012

Rockin' Penguins

This was another lesson inspired by the winter concert this year!  What says winter concert more than some cute penguins playing electric guitars?  So my second graders got to work!

Step 1:  The penguin
For sake of time, I made templates for the outline of the penguin and the arms.  The students traced these on their paper but were still responsible for drawing the inside lines (defining the black and white areas & the face)  
The students then painting the black and orange area.  We let the white paper be the white of the penguin's body but you could always choose to have them paint this part or make the penguin more realistic looking by adding some grey shadows in the white.  
* The arms are done separately so that when the entire picture gets assembled the arms can be arranged to appear as though they are holding the guitar

Thursday, April 14, 2011

Aboriginal Snakes


In college I spent 6 months In Melbourne, Australia as part of a Study Abroad Program. 

Me in front of Uluru 
We wore Mosquito Nets on Our head to keep off All the FLIES!
What a rewarding experience!!  Melbourne was the cleanest and most functioning city I have ever seen and the people were so friendly!  During my stay there I traveled with a group to the center of Australia.. To the place which makes up what most American's imagine of Australia.. The Great Outback.  The red sand, Hot sun, and nothing but rocks!  One thing you don't see in the pictures are all the FLIES!
kangaroo Tails- Poor Kangaroos!
                                                                                                                     

Tuesday, April 12, 2011

Embroidered Birds

To celebrate the start of Spring I had my Second Graders do an art lesson with Birds as the Subject Matter.  But I really surprised them when I said we would be sewing our birds instead of painting or drawing them! 


The first thing we did was go over Needle safety.  We used needles that are a little more blunt and made for  children, but even so it is important to be careful.   


Next I gathered the students around the table for a demonstration.  I went over how to thread the needle and how to form a knot at the end so that the yarn doesnt come through the other side.  Next I showed them a few different kinds of stitches and the different effects each stitch had.  

Tuesday, March 1, 2011

This Cat Needs a New Hat!!

For Read Across America, I created a contest for my  Second Graders!  Their goal was to make Dr. Seuss's Cat in the Hat a New Hat!! They had to use their imagination to create a unique new hat to replace the classic red & white striped hat that Dr. Seuss has made famous!  I talked to the students about how professional or famous artisits usually make several sketches before starting their artwork sometimes with very small modifications.  They also plan out their colors before starting.  So The students were to complete several sketches of different designs for their hat & then the students were supposed to star * their favorite design and that was the design they were going to do for the contest.  The kids came up with some great ideas!!! Once their hats were drawn on big paper I introduced the class to all the different supplies I had to offer I then went around to each table and took their "orders" like a waitress at a restaurant would.  The students enjoyed this!  I delivered the supplies to each table and they began!!  Here are the student's Creative Hats!!   


Which hat would you have chosen to win??

Monday, February 21, 2011

Jazz Music Collage

This project was in collaboration with the music teacher.  I took the music sheet to the song the class was singing/dancing to in the Black History Month Concert & had the students use these as part of their collage.  An Autistic Class completed these.  The students ranged from 1st to fourth grade.  We focus on manipulation of materials as well as arrangement/spacing.  Key Concepts that are reviewed are Collage, Warm vs. Cool Colors, Background, three-dimensional vs. two dimensional.  


The first thing I do is dump a bunch of music notes onto their tables.  These I have cut out of manila folders.  The students pick which ones they want and tape them onto their paper.  


Next, the students are given warm colors ( I tell them to think of a flame)  They sponge paint their papers going right over their music notes.  


Adinkra Cloth Printmaking

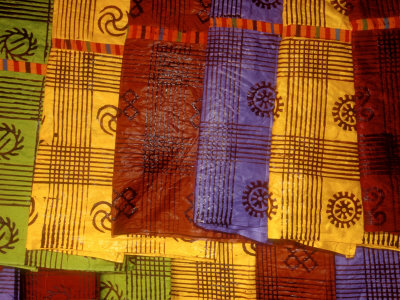
In honor of Black History Month, my second graders are going to be learning about Adinkra Cloths.  I show the students a PowerPoint about the Adinkra Cloths and how they are made.  We learn that Adinkra clothes are hand printed fabrics that the Ashanti people of Ghana made.  


I ask the students what is a symbol?  We talk about symbols that we see in our everyday life such as the apple for mac computers, A peace Sign, the American Flag etc.  I explain to them that the Ainkra clothes are made up of symbols.  I give them a handout of some of the most commonly used symbols.  


This project involves many concepts and skills such as drawing, Printmaking, Self Portraits, and working with Mixed. Media.  

  1. The first step is Printmaking.  
    • Students get sketch paper and must make 4 sketches of different symbols.
    •   Students then get three  2in x 2in square of styrofoam to make their best three symbols into stamps.  I demonstrate to the students how they are to use their pencil to make indents into the styrofoam.  They need to make it deep enough without going through the styrofoam and making a hole.   
    • The students get a 12inx12in piece of tan paper.  They fold it in half to make 16 squares total.  
    • I put out printmaking trays (they are slanted with a pit at the bottom for the paint.. this way the rollers can get dipped in the paint and then roll up the ramp to fully cover the roller & get rid of excess paint)  They are given red, blue, green, and yellow.  
    • Students roll the paint onto their symbols and stamp them into the boxes pressing hard.  I point out to them that each symbol needs to stay one color OR they need to watch their symbol before switching colors.  
    • THe students get black paint and different rollers and plastic forks to add borders around their symbols.